Our bedside table was a toughie. It was one of those pieces of furniture that I had such an exact picture of what I wanted that it was never going to materialise without a bit of magic. Do you know what I mean?
It had to match what I already loved in the room. Not matchy-matchy (I didn't want mahogany, for example; I thought that would look to 'heavy' and formal) but it had to be part of the attic-chic look.
It needed to be low. I had the bedside lamp all ready to go on it (Note to self: don't buy the bedside light before you have the table in place....). It's a tall mahogany candle-stick lamp. I love it but it has to fit under the slopey ceiling.....so the table needed to be LOOOOOOW.
Plus I actually like lower tables. I like to be able to see what's on them without having to lift my head from my pillow.
Lazy? Me? Errr....yes....
This was one of those pieces that had me looking....and looking.... and looking.....
Nothing.
Not. A. Thing.
Then inspiration struck (about time too, if you don't mind me saying...). I should buy one in the size I wanted and paint it! Problem-solved....
I started off with one similar to this:
I loved the design - ticks all the boxes - but obviously not the pine colour.
Pine and mahogany TOGETHER?
Big N.O..
Pine and mahogany TOGETHER?
Big N.O..
So.....I decided to bite the bullet and get the paint brushes out!
This was my very first furniture makeover. I was really nervous. Far too nervous to think of picking up my camera, I realised after the deed was done!
(sorry)
It needed stripping to get the waxed finish off - this was just a case of brushing the stripper on and then wiping off after ten minutes - sanding and priming (leave to dry...) and sanding and painting (leave to dry...) and sanding and painting on the final coat.
Not rocket science but I think it's the thinking up of the idea that counts.... :-)
The sanding between coats is so important. It makes a huge difference to the quality of the end finish.
No little bumps.
Not rocket science but I think it's the thinking up of the idea that counts.... :-)
The sanding between coats is so important. It makes a huge difference to the quality of the end finish.
No little bumps.
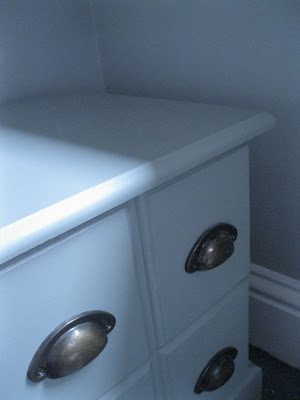
What a palaver! But it gave me JUST what I was looking for. We used Farrow and Ball Pigeon, which I LOVE!
The quality of Farrow and Ball paint colours is incredible. Deep and intese yet chalky and subtle.
Mmmmmm....
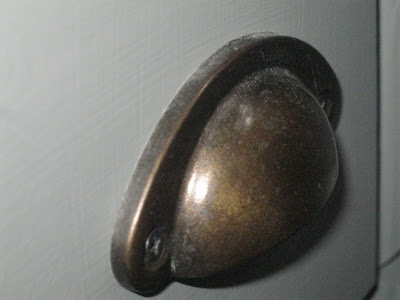
I love the industrial feel to the new handles.
We took the old ones off and screwed these ones on in their place, after filling in the old holes, before we painted.
We took the old ones off and screwed these ones on in their place, after filling in the old holes, before we painted.
As well as screwing them in, I glued them down with Gorilla Glue to allow for pulling them open at awkward angles. I wanted a super-strong finish.
Even King Kong couldn't get these babies off now.
I love the roomy drawers: perfect for all my magazines and books and hair clips and letters..... oh, and Mr Modern Country has part of one drawer.
Even King Kong couldn't get these babies off now.
I love the roomy drawers: perfect for all my magazines and books and hair clips and letters..... oh, and Mr Modern Country has part of one drawer.
He doesn't have many hair clips, you see...
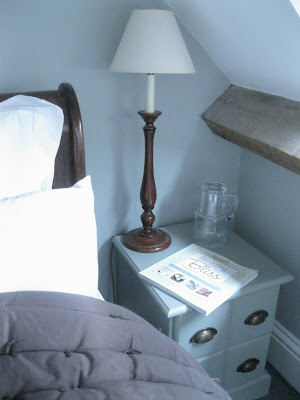
It's got a good sized-top for putting lovely things on.
Here's the foolishly-pre-bought-but still-very-lovely-candlestick lamp.
All that faffing about with paintbrushes was worth it in the end.
*Sigh*
Do you know this book: Blogging For Bliss? It's FAB! I'm going to do a book review on Monday.
I think you'll LOVE it!
I want to say a BIG thank you to Brenda at Cozy Little Housee for giving me a lift on her very comfy Welcome Wagon.
This how she describes Modern Country Style:
Modern Country Style is Sarah's blog. She lives in the United Kingdom. Her blog is all about renovating her Edwardian home. Naturally, she loves Modern Country style! She has a keen interest in pared-back interiors, infused with the warmth of country. Gentle grays, accents of red, and a hint of industrial.
Isn't that just spot-on? If I could make up how I'd like my style to be described that would be it!!
Thank you!
Did I say, I LOVE this colour?
The colour was the most important thing to get right. I am a crazy lady when it comes to paint choice.
I just can't rest until I've found the P.E.R.F.E.C.T colour.
The colour I chose might not be perfect for everyone - in fact, I rather hope it isn't - but it's COMPLETELY my cup of tea.
I wanted it to go perfectly with the wall colour. I spent aaaaages looking at paint samples.
Many happy hours....
It's one of those colours I can just staaaaaaaare at for ages.
What do you think?
Paint Case Study coming right up......


pbTDQBWk~$(KGrHqN,!hsEw5FpFwGQBMOdjNd96w~~_12.jpg)


0 comments:
Post a Comment